Prompt for computer name during Configmgr 2012 R2 os deployment
If you are using System Center 2012 R2 Configuration Manager (ConfigMgr 2012 R2) to deploy operating systems you properly know that if you redeploy (refresh) a machine it will keep the name (hostname) it had before.
But if you are deploying an operating system to a new machine (unknown) you have to do some work to get the machine named correctly. When it comes to naming the machine you basically have 3 options:
- Import (prestage) the machine in ConfigMgr 2012 R2 by specifying the name, MAC or SMBIOSGUID.
- Add an empty Collection Variable named OSDComputerName to the All Unknown Computers collection
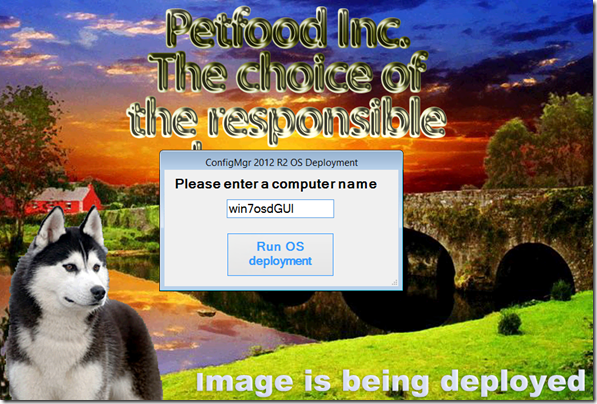
- Use a HTA or GUI that prompts you for a computer name at the start of the task sequence
Even though prestaging works well if you want to control which machines that are allowed to PXE boot into the ConfigMgr 2012 environment, administration can be cumbersome if you are dealing with a lot of new machines. You need access to the ConfigMgr 2012 R2 console and permission in order to prestage a machine.
Using the OSDComputerName variable on the All Unknown Computers collection is really simple to implement – you just add a variable to that collection named OSDComputerName without specifying a value.
It works well if you just want a very basic interface where you can input the computer name. The downside to this approach is that it is not really that user friendly as it might not be apparent what you are actually asked for and you cannot check if the name uphold certain naming conventions.
The user experience is as seen below in the two screenshots:
The user has to click the OSDComputerName
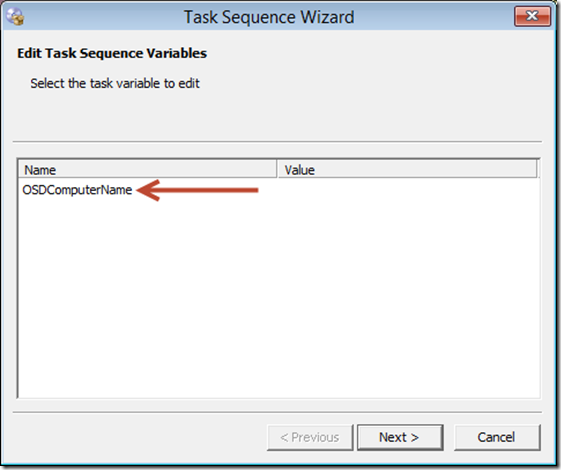
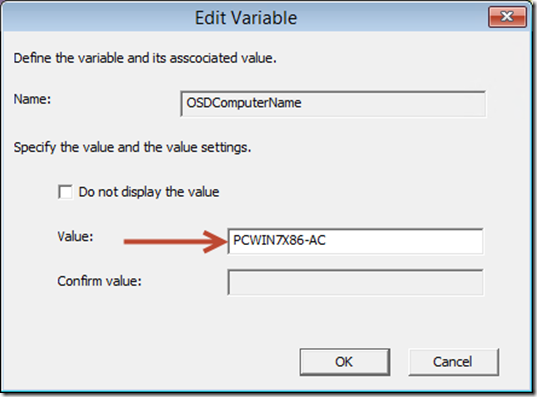
In the Edit Variable window, you fill in the computer name in the Value field and then press OK. You are then returned to Task Sequence Wizard window and then click Next to continue the os deployment.
That brings us to options number 3 – using a GUI to ask for the computer name. In this post I will show you how to implement an already made PowerShell GUI into your OS deployment Task Sequence.
Because the GUI is written in PowerShell the first thing to do is to add PowerShell support in your Boot Images. All the steps are detailed in this separate blog post: http://mimercon.dk/adding-powershell-support-in-configuration-manager-2012-r2-boot-images/
Preparing the script
Open notepad (or any text editor of your own choice) and copy the script below into the empty notepad document.
Save the the document as ComputerNamePrompter.ps1 in your source folder which must be shared. If you are using Notepad remember to select All Files next to the Save as type field.
<# Start you Copy from here
 .NOTES
 --------------------------------------------------------------------------------
 GUI (Windows Forms) generated by: PowerShell Studio 2014 v4.1.60
 Code logic by: Michael Buchardt
 Organization: Mimercon
 --------------------------------------------------------------------------------
#>
#----------------------------------------------
#region Application Functions
#----------------------------------------------
#endregion Application Functions
#----------------------------------------------
# Generated Form Function
#----------------------------------------------
function Call-ComputerNamePrompter_psf {
 #----------------------------------------------
 #region Import the Assemblies
 #----------------------------------------------
 [void][reflection.assembly]::Load('System, Version=2.0.0.0, Culture=neutral, PublicKeyToken=b77a5c561934e089')
 [void][reflection.assembly]::Load('System.Windows.Forms, Version=2.0.0.0, Culture=neutral, PublicKeyToken=b77a5c561934e089')
 [void][reflection.assembly]::Load('System.Drawing, Version=2.0.0.0, Culture=neutral, PublicKeyToken=b03f5f7f11d50a3a')
 [void][reflection.assembly]::Load('mscorlib, Version=4.0.0.0, Culture=neutral, PublicKeyToken=b77a5c561934e089')
 [void][reflection.assembly]::Load('System.Data, Version=2.0.0.0, Culture=neutral, PublicKeyToken=b77a5c561934e089')
 [void][reflection.assembly]::Load('System.Xml, Version=2.0.0.0, Culture=neutral, PublicKeyToken=b77a5c561934e089')
 [void][reflection.assembly]::Load('System.DirectoryServices, Version=2.0.0.0, Culture=neutral, PublicKeyToken=b03f5f7f11d50a3a')
 #endregion Import Assemblies
 #----------------------------------------------
 #region Generated Form Objects
 #----------------------------------------------
 [System.Windows.Forms.Application]::EnableVisualStyles()
 $Blog = New-Object 'System.Windows.Forms.Form'
 $buttonRunOSDeployment = New-Object 'System.Windows.Forms.Button'
 $textbox1 = New-Object 'System.Windows.Forms.TextBox'
 $labelPleaseEnterAComputer = New-Object 'System.Windows.Forms.Label'
 $errorprovider1 = New-Object 'System.Windows.Forms.ErrorProvider'
 $InitialFormWindowState = New-Object 'System.Windows.Forms.FormWindowState'
 #endregion Generated Form Objects
 #----------------------------------------------
 # User Generated Script
 #----------------------------------------------

 $OnLoadFormEvent={
 #Hide the task sequence progress dialog until next step
 $TSProgressUI = new-object -comobject Microsoft.SMS.TSProgressUI
 $TSProgressUI.CloseProgressDialog()
 }

 function Validate-IsEmptyTrim ([string] $field)
 {
 if($field -eq $null -or $field.Trim().Length -eq 0)
 {
 return $true
 }
 return $false
 }

 $labelPleaseEnterAComputer_Click={
 }
 $textbox1_TextChanged={
 #Clear the error message
 $errorprovider1.SetError($textbox1, "");
 }

 $buttonRunOSDeployment_Click={
 #Get Computer Name from input
 $NewComputerName = $textbox1.Text

 #Send Computer Name to SCCM TS
 $tsenv = New-Object -ComObject Microsoft.SMS.TSEnvironment
 $tsenv.Value("OSDComputerName") = "$NewComputerName"
 #$tsenv.Value("OSDComputerName") = "$($NewComputerName)"

 #Close form and Exit Script when RunOSDeployButton is clicked
 $Blog.Close()
 #Write-Host $NewComputerName
 #Write-Host $tsenv.Value("OSDComputerName")
 }
 $textbox1_Validating=[System.ComponentModel.CancelEventHandler]{
 #Event Argument: $_ = [System.ComponentModel.CancelEventArgs]

 #Check if the Name field is empty
 $result = Validate-IsEmptyTrim $textbox1.Text
 if($result -eq $true)
 {
 #Display an error message
 $errorprovider1.SetError($textbox1, "The computer name cannot be blank");
 $_.Cancel = $true
 }
 else
 {
 #Clear the error message
 $errorprovider1.SetError($textbox1, "");
 }
 }

 # --End User Generated Script--
 #----------------------------------------------
 #region Generated Events
 #----------------------------------------------

 $Form_StateCorrection_Load=
 {
 #Correct the initial state of the form to prevent the .Net maximized form issue
 $Blog.WindowState = $InitialFormWindowState
 }

 $Form_Cleanup_FormClosed=
 {
 #Remove all event handlers from the controls
 try
 {
 $buttonRunOSDeployment.remove_Click($buttonRunOSDeployment_Click)
 $textbox1.remove_TextChanged($textbox1_TextChanged)
 $textbox1.remove_Validating($textbox1_Validating)
 $labelPleaseEnterAComputer.remove_Click($labelPleaseEnterAComputer_Click)
 $Blog.remove_Load($OnLoadFormEvent)
 $Blog.remove_Load($Form_StateCorrection_Load)
 $Blog.remove_FormClosed($Form_Cleanup_FormClosed)
 }
 catch [Exception]
 { }
 }
 #endregion Generated Events
 #----------------------------------------------
 #region Generated Form Code
 #----------------------------------------------
 $Blog.SuspendLayout()
 #
 # Blog
 #
 $Blog.Controls.Add($buttonRunOSDeployment)
 $Blog.Controls.Add($textbox1)
 $Blog.Controls.Add($labelPleaseEnterAComputer)
 $Blog.AcceptButton = $buttonRunOSDeployment
 $Blog.ClientSize = '364, 181'
 $Blog.ControlBox = $False
 $Blog.Font = "Microsoft Sans Serif, 12pt"
 $Blog.KeyPreview = $True
 $Blog.MaximizeBox = $False
 $Blog.MinimizeBox = $False
 $Blog.Name = "Blog"
 $Blog.ShowIcon = $False
 $Blog.StartPosition = 'CenterScreen'
 # Edit the line below to change the text (Form Name)
 # "Config 2012 R2 OS Deployment"
 $Blog.Text = "ConfigMgr 2012 R2 OS Deployment"
 # Edit End
 $Blog.add_Load($OnLoadFormEvent)
 #
 # buttonRunOSDeployment
 #
 $buttonRunOSDeployment.Font = "Microsoft Sans Serif, 14pt, style=Bold"
 $buttonRunOSDeployment.ForeColor = 'MenuHighlight'
 $buttonRunOSDeployment.Location = '97, 98'
 $buttonRunOSDeployment.Name = "buttonRunOSDeployment"
 $buttonRunOSDeployment.Size = '167, 68'
 $buttonRunOSDeployment.TabIndex = 2

 # Edit the line below to change the text (Button)
 # "Run OS deployment"
 $buttonRunOSDeployment.Text = "Run OS deployment"
 # Edit End

 $buttonRunOSDeployment.UseVisualStyleBackColor = $True
 $buttonRunOSDeployment.add_Click($buttonRunOSDeployment_Click)
 #
 # textbox1
 #
 $textbox1.AcceptsReturn = $True
 $textbox1.Font = "Microsoft Sans Serif, 14pt"
 $textbox1.Location = '97, 46'
 $textbox1.MaxLength = 15
 $textbox1.Name = "textbox1"
 $textbox1.Size = '167, 29'
 $textbox1.TabIndex = 1
 $textbox1.add_TextChanged($textbox1_TextChanged)
 $textbox1.add_Validating($textbox1_Validating)
 #
 # labelPleaseEnterAComputer
 #
 $labelPleaseEnterAComputer.Font = "Microsoft Sans Serif, 16pt, style=Bold"
 $labelPleaseEnterAComputer.Location = '12, 9'
 $labelPleaseEnterAComputer.Name = "labelPleaseEnterAComputer"
 $labelPleaseEnterAComputer.Size = '339, 34'
 $labelPleaseEnterAComputer.TabIndex = 0
 # Edit the line below to change the text
 # "Please enter a computer name"
 $labelPleaseEnterAComputer.Text = "Please enter a computer name"
 # Edit end
 $labelPleaseEnterAComputer.add_Click($labelPleaseEnterAComputer_Click)
 #
 # errorprovider1
 #
 $errorprovider1.BlinkStyle = 'AlwaysBlink'
 $errorprovider1.ContainerControl = $Blog
 $Blog.ResumeLayout()
 #endregion Generated Form Code
 #----------------------------------------------
 #Save the initial state of the form
 $InitialFormWindowState = $Blog.WindowState
 #Init the OnLoad event to correct the initial state of the form
 $Blog.add_Load($Form_StateCorrection_Load)
 #Clean up the control events
 $Blog.add_FormClosed($Form_Cleanup_FormClosed)
 #Show the Form
 return $Blog.ShowDialog()
} #End Function
#Call the form
Call-ComputerNamePrompter_psf | Out-Null
#End you copy here
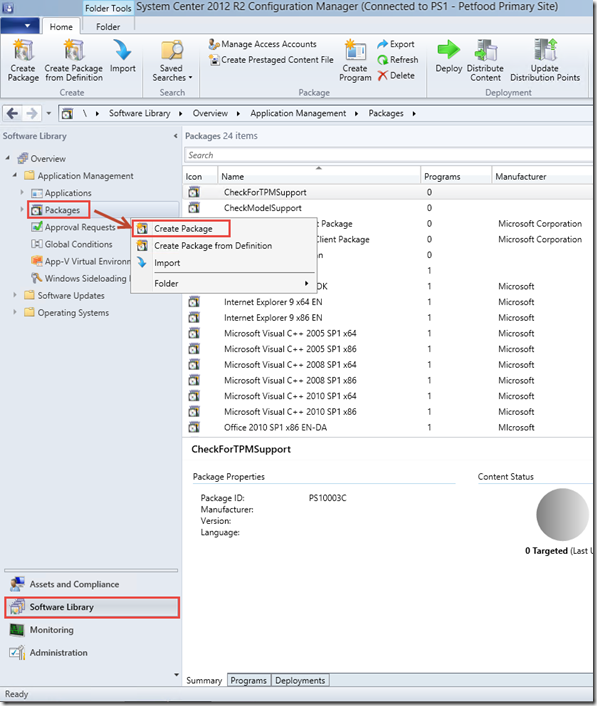
Create a new Package for the script
Open the Configuration Manager Console and select the Software Library Workspace. In the Navigation Pane, expand Application Management, right-click Packages and select Create Package
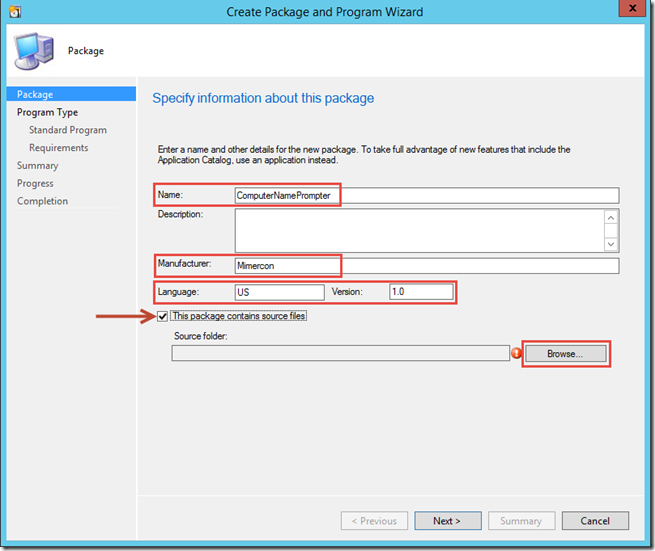
On the Package page of the Create Package and Program Wizard, fill in the following information:
Name: ComputerNamePrompter
Manufacturer: YourCompanyName
Language: US
Version: 1.0
Select This package contains source files and then click Browse
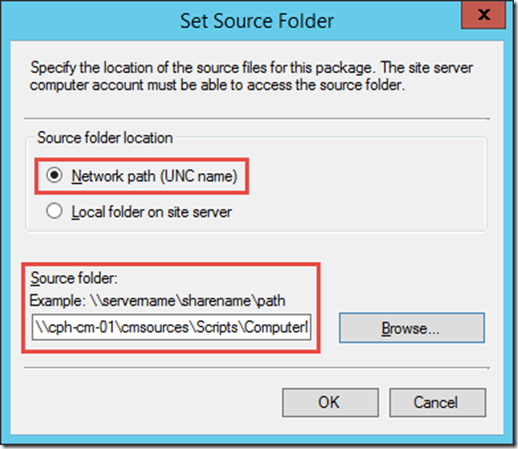
In the Set Source Folder window, select Network path (UNC name) and in the Source folder field, type the location where you saved the script before i.e \\cph-cm-01\cmsources\Scripts\ComputerNamePrompter
Then click OK
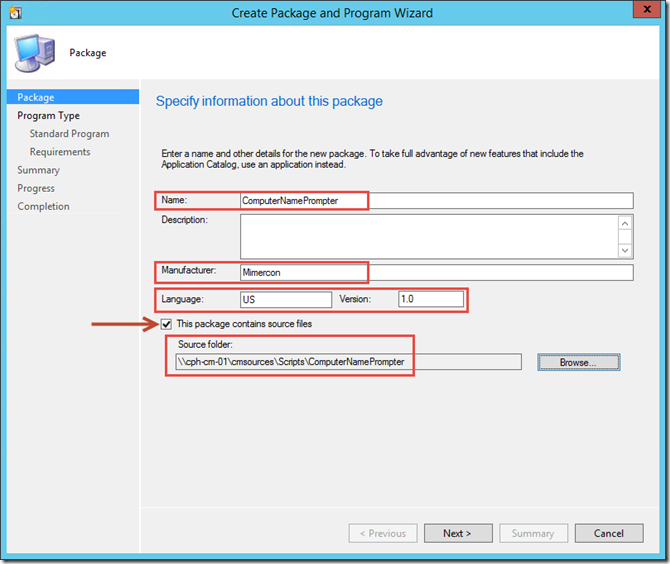
Back on the Package page of the Create Package and Program Wizard, verify that the information is correct and then click Next
On the Program Type page of the Create Package and Program Wizard, select Do not create a program ,click Next two times and then click Close

Distribute the Package to your Distribution Point
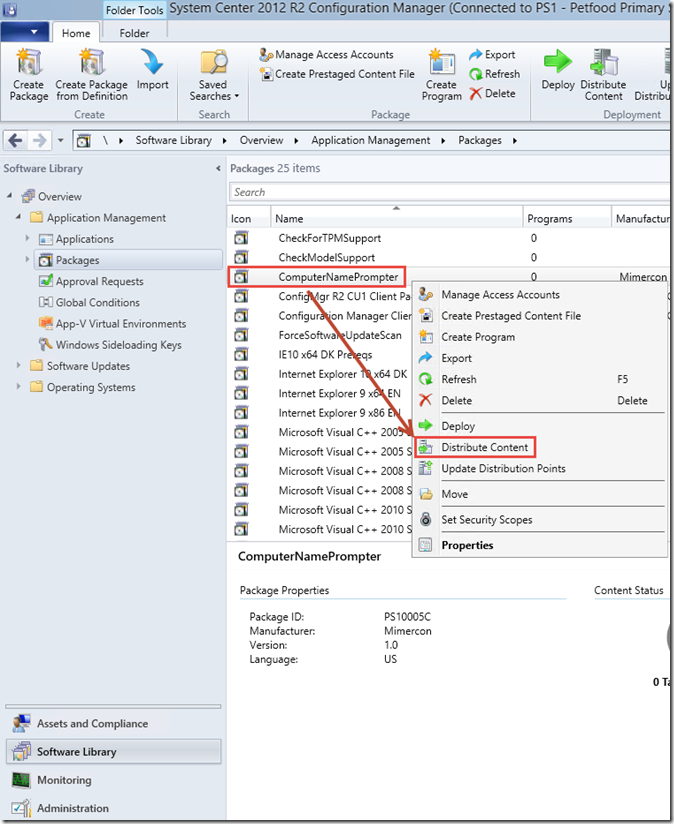
In the Configuration Manager console, select the Software Library Workspace, expand Application Management and select Packages
In the details pane under Packages, right-click the ComputerNamePrompter package and select Distribute Content
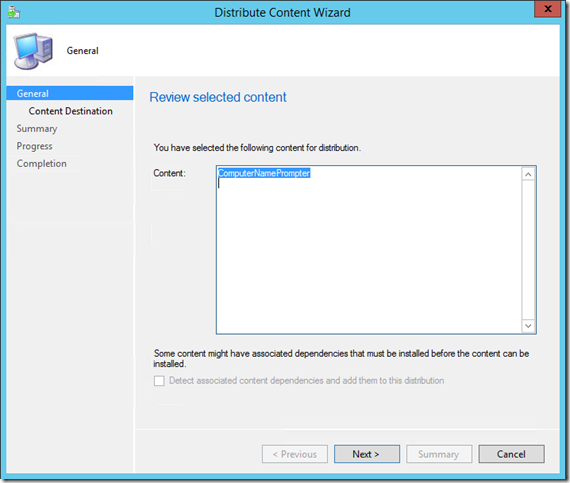
On the General page of the Distribute Content Wizard, click Next
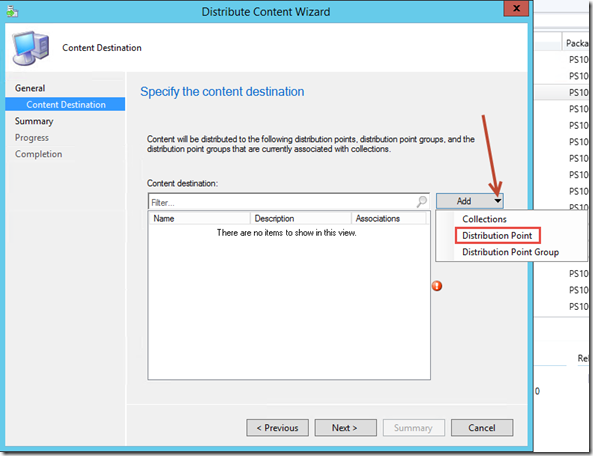
On the Content Destination page of the Distribute Content Wizard, click Add and Select Distribution Point
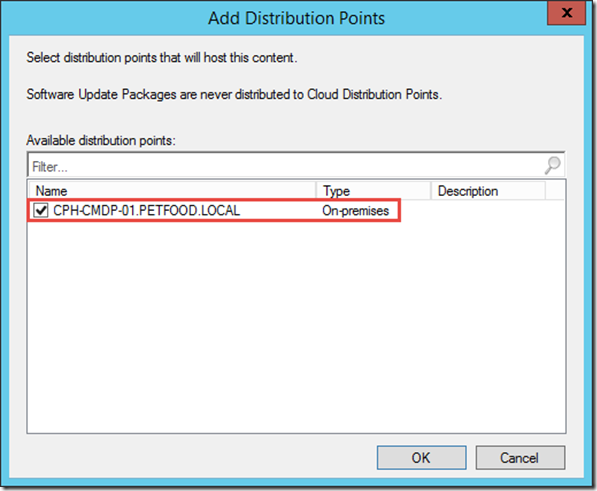
In the Add Distribution Points window, select your distribution point(s), i.e CMDP02.PETFOOD.LOCAL and then click OK
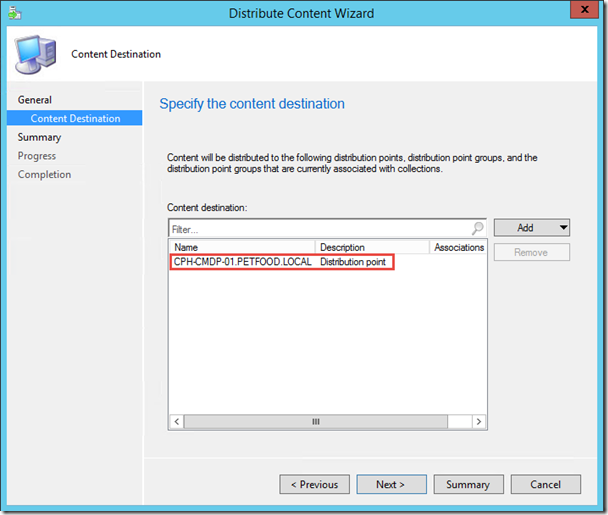
On the Content Destination page of the Distribute Content Wizard, verify that the distribution point(s) you just selected is listed under Content destination and then click Next
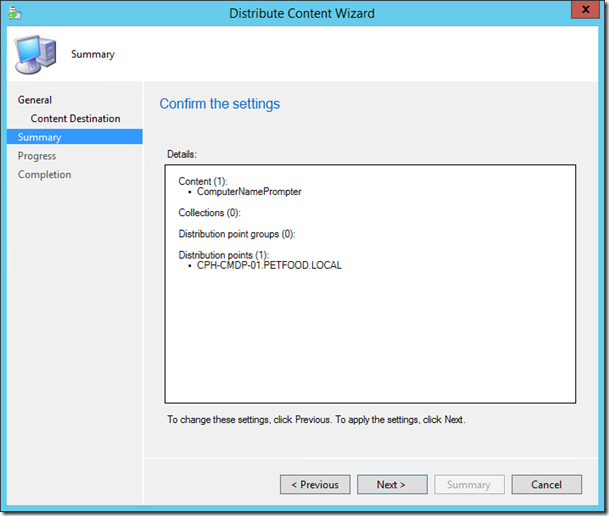
On the Summary page of the Distribute Content Wizard, verify your selections and click Next
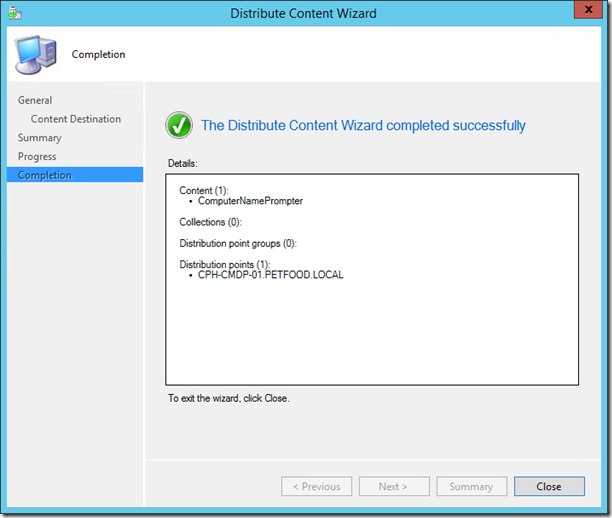
On the Completion page of the Distribute Content Wizard, verify that the wizard completed successfully and then click Close
Add the script to your task sequence
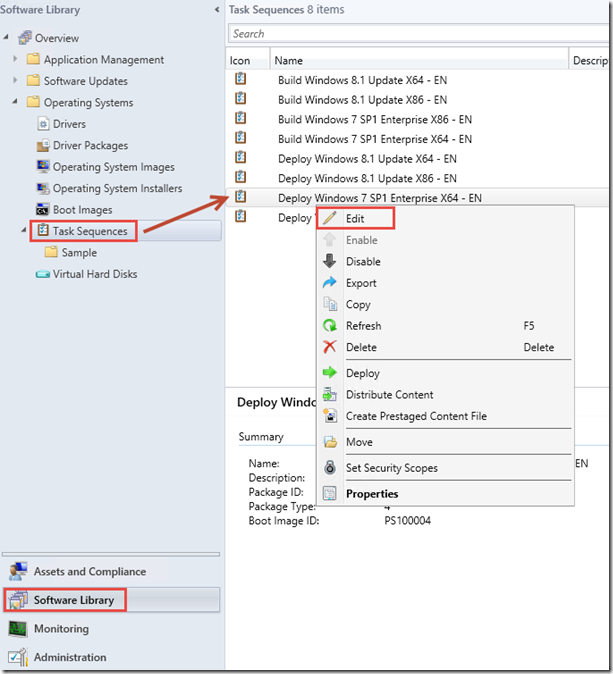
In the Configuration Manager console, select the Software Library Workspace, expand Operating Systems and select Task Sequences
In the details pane under Task Sequences, right-click the Task Sequence where you want to add it to prompt for computer name and select Edit i.e Deploy Windows 7 SP1 Enterprise X64 – EN
In the Deploy Windows 7 SP1 Enterprise X64 – EN Task Sequence Editor window, click the Partition Disk 0 – UEFI task sequence step
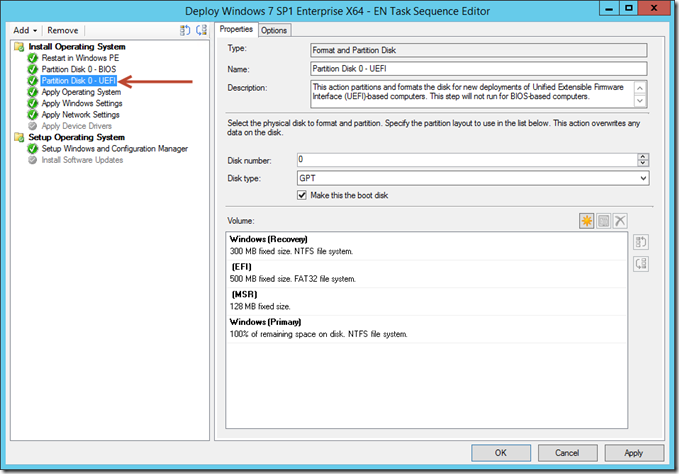
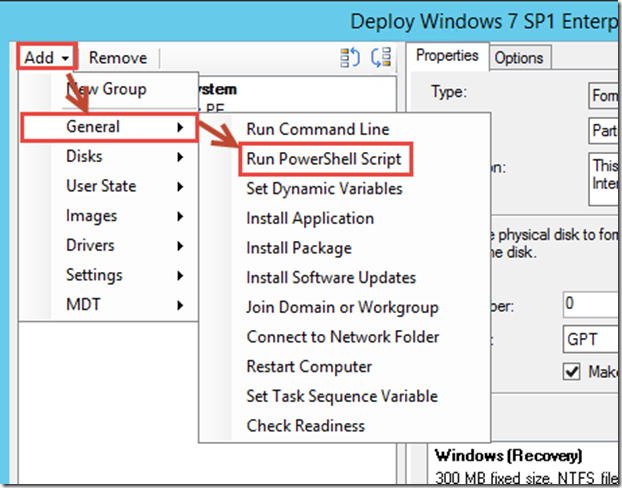
Still in the Deploy Windows 7 SP1 Enterprise X64 – EN Task Sequence Editor window, click Add, select General and the click Run Powershell Script
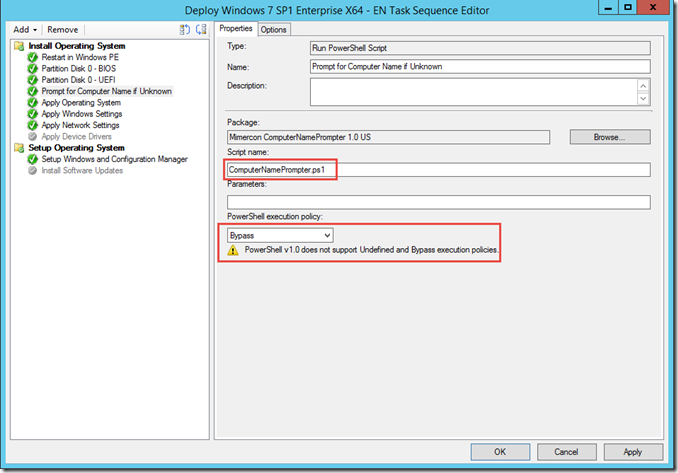
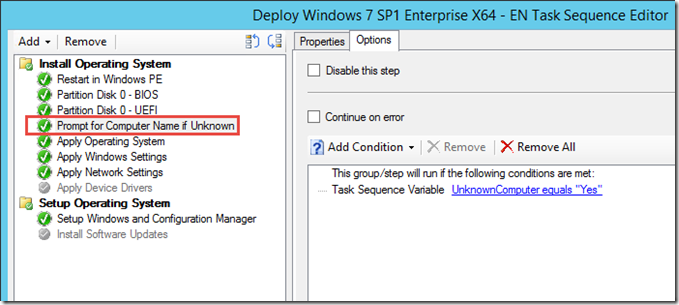
On the Properties tab of the Run PowerShell Script task sequence step, type Prompt for Computer Name if Unknown and then click the Browse button next to the Package field

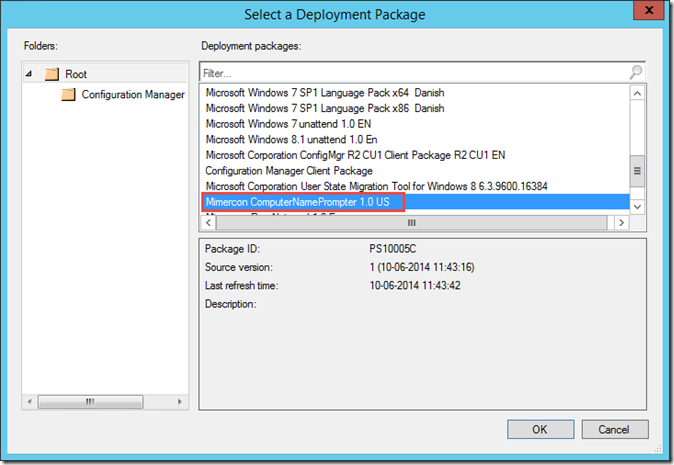
In the Select a Deployment Package window, select the Mimercon ConputerNamePrompter 1.0 US package you created earlier and then click OK
Back on the Properties tab of the Run PowerShell Script task sequence step, type ComputerNamePrompter.ps1 in the script name field and in the PowerShell execution policy field select Bypass
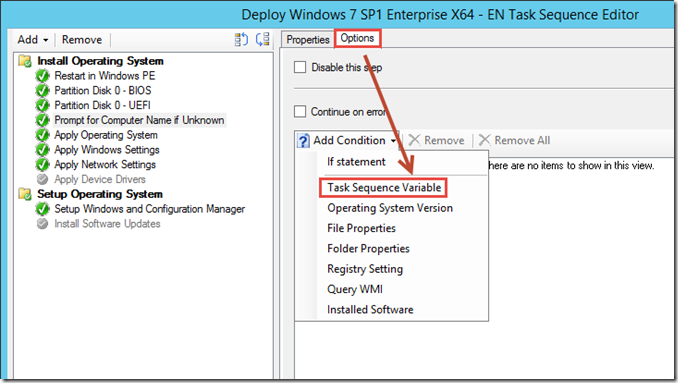
Still in the Deploy Windows 7 SP1 Enterprise X64 – EN Task Sequence Editor window, click the Options tab and then click Add Condition. Select Task Sequence Variable
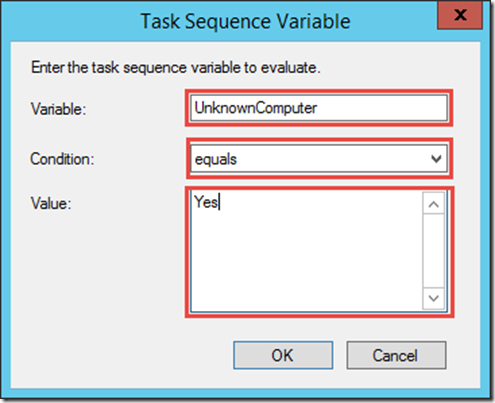
In the Task Sequence Variable window, type the following in the fields and then click OK:
Variable: UnknownComputer
Condition: equals
Value: Yes
Back in the Deploy Windows 7 SP1 Enterprise X64 – EN Task Sequence Editor window, verify that the Prompt for Computer Name if Unknown step is placed right after the Partition Disk 0 – UEFI step and then click OK
Add variable to the All Unknown Computers Collection
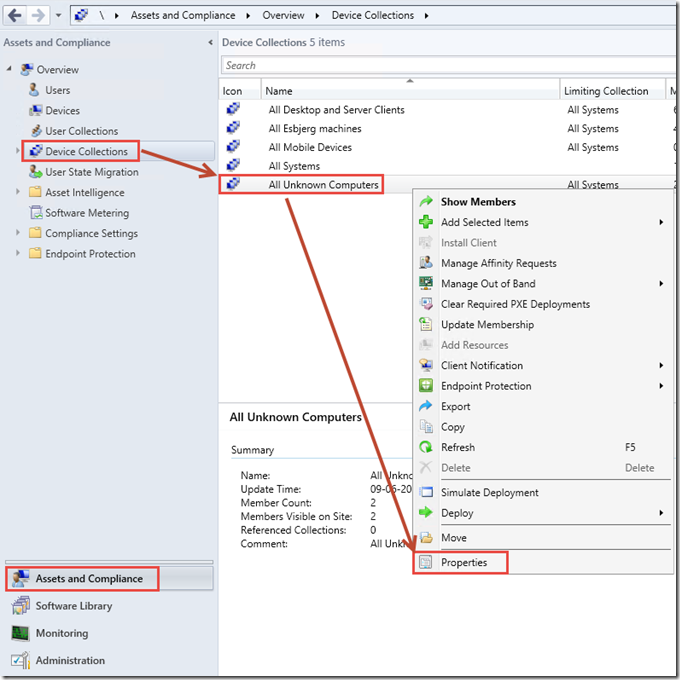
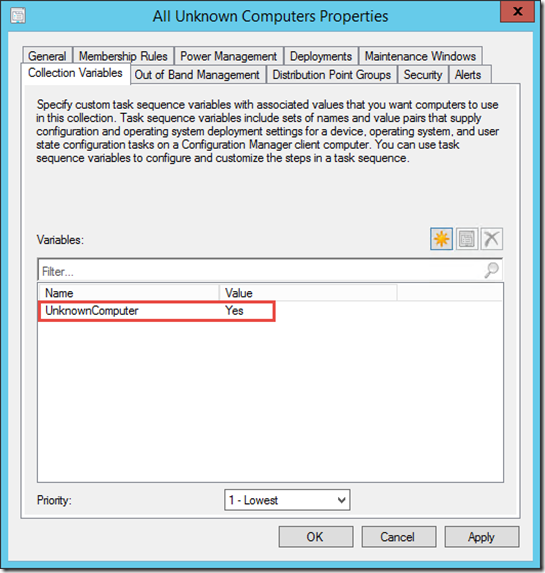
In the Configuration Manager console, select the Assets and Compliance Workspace, select Device Collections and in the details pane under Device Conllections, right-click the All Unknown Computers collection and choose Properties
In the All Unknown Computers Properties window, select the Collection Variable tab and then click the asterisk
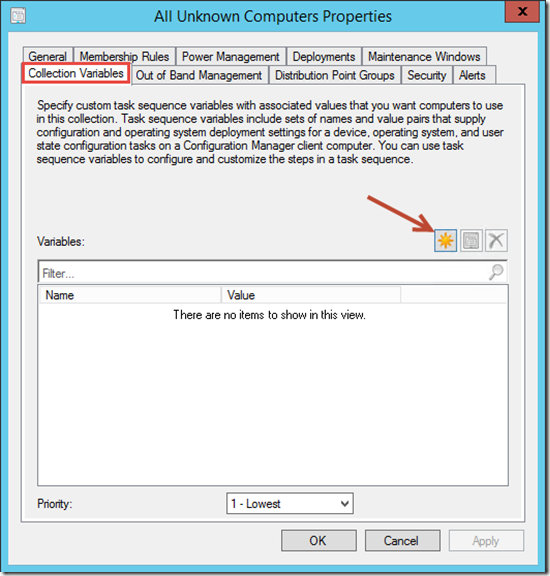
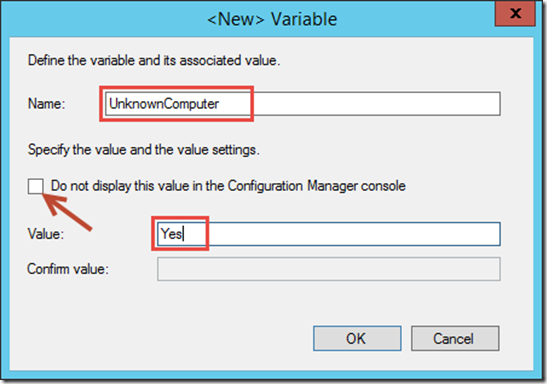
In the <New> Variable window, remove the check mark next to Do not display this value in the Configuration Manager console and type the following:
Name: UnknownComputer
Value: Yes
Then click OK
Back in the All Unknown Computers Properties window, verify that UnknownComputer is displayed under the Name heading and that Yes is display under the Value heading. Then click OK
Testing
All you have left to do is to PXE boot a machine and verify that the ComputerNamePrompter PowerShell GUI is shown if the computer is unknown. Type a computer name and let the Task Sequence run its course. When the machine is deployed verify that the machine has been given the name you typed in the GUI